Each year I've been trying to get more creative with ideas for Spencer's birthday cake. The plan this year was to incorporate LEDs in place of candles. I eventually settled on an Altair / IMSAI / PDP -style computer since those are the type of computers that inspired his RC2014. The IMSAI 8080 has the most colourful switches as well as a name that I could twist.

The thought that it could show randomly flashing lights (as if the computer were running) and that it could also play a game of 'kill the bit' was very appealing. A plan formed to use a capacitive touch pad on the cake itself.
The first job is to bake the fruitcake. I often use a 7" square tin and one of those cut in half and rearranged makes a cake of suitable proportions.

Even after taking a slice off the faces to make them nice and square, there are still some rounded corners, so after putting on the marzipan, I used more marzipan as a filler to flatten the whole thing.
Even though I wanted to end up with a simulation of red LEDs, I decided to use neopixels (addressable RGB LEDs). Partly because I'm using them a lot, so the software side would be easy, and partly because it allows for some more colourful animations. It turns out that colourful animations really look great even if not entirely authentic.
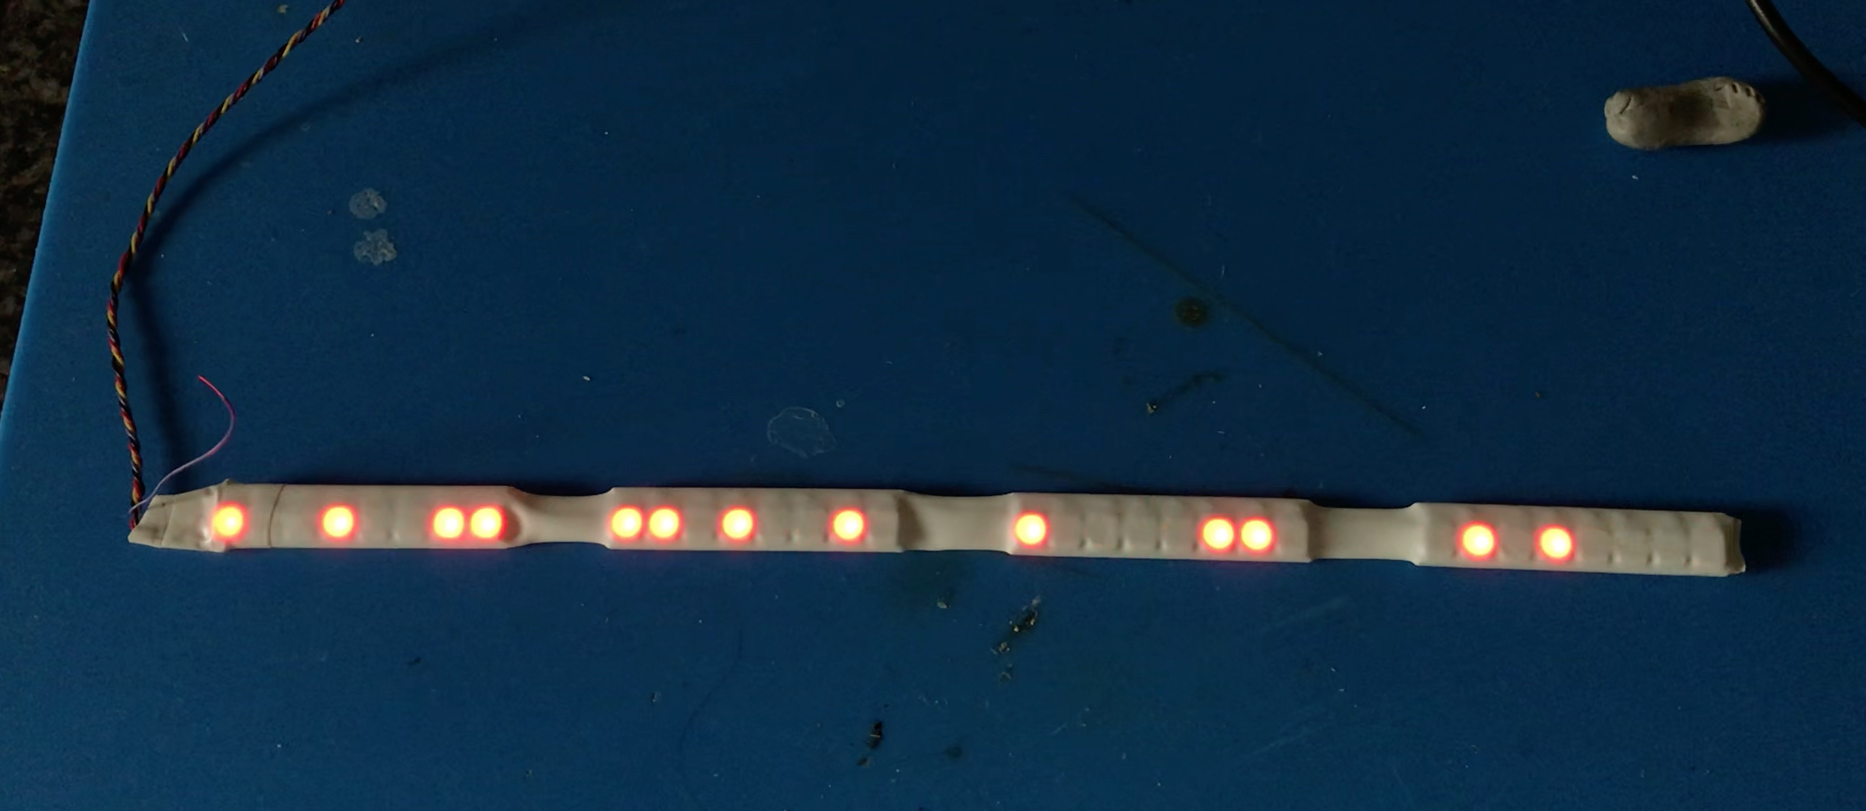
I wanted to fit in 32 LEDs - perhaps suggesting 16 address lines, eight data lines and eight status bits. flexible LED strips tend to have the pixels spaced quite far apart, so I found these sticks of eight with the pixels quite tightly packed. I made a stick of 32 by joining four of those (using component legs) and sealed the lot inside some white heatshrink tube. That worked really well but it turns out that one useful tip would have been to test this stick before sealing it inside the heatshrink....
I wanted to sandwich the stick between the marzipan and top layer of icing, so added a layer of icing and cut out a slot for the stick to keep everything nice and flush. Shown here with one final layer of white icing still to go on top.

The icing turns out to be quite translucent, but has a diffusing effect and so for lenses, I found these clear, edible cake-decorating jewels. By turning on the lights I could see where they were, and drill through that top layer of icing to insert the jewels. The effect is pretty good. Getting them in a perfectly straight line without marking the icing was hard.

My big fail was to lose the end of the capacitive-touch wire between the layers of icing. I wasn't able to find it and pull it out to the top. So it's still buried in there. I had to leave it unconnected and use a physical button on the controller instead. That's probably an easier way to play the game than a capacitive touch pad on top of the cake anyway.
The final step was the blue case. That was easy - just roll out blue icing to an even thickness, trim it to size and wrap it around the sides of the cake. I couldn't think of an edible way to print the name of the computer, so I just printed that onto paper and placed it on top.
For the switches I found some sweets that came in both red and blue.
The result was very pleasing. It's all edible except for the neopixel stick encased in its heatshrink tubing. We can't know whether that's food-safe, so it's probably advisable to not eat any of the icing or marzipan that's been in close contact with it.
I made a 'controller' with a board from another project. It already had a pico with header pins, a thumbwheel connected to one of the analogue input pins (for brightness) and two buttons, one for switching the animation/game and one for playing the game.

At the eleventh hour I realised that I should have driven the pixels with an RC2014 and so at the very last moment I was still debugging Z80 assembly! But it was worth the stress because when he first saw it, it was running off an RC2014. This is particularly appropriate because not only is it the computer that Spencer designed, but its Z80 cpu is a slightly younger relation of the 8080 used by the machines the cake is based on.
Kill the Bit is a game traditionally toggled into this kind of computer for testing as it consists of very few bytes. It runs on the cake, both when driven by the controller board and when driven by the RC2014 (with a button on the digital i/o module being the 'fire' button.)


As it turns out, Spencer chose to slice the top off before cutting the rest up to eat, meaning that the 'front panel' will live on. I don't know how long it'll last. I think the sugar is a preservative and people keep decorations from a wedding cake for years. It may need to be kept in a cool and dry environment.
Shown here with the plasma demo running. Not so authentic but does look awesome.

Comments
Post a Comment